

Cedar shingle panel installation is faster and more predictable than laying individual shingles when the wall is prepared correctly. The interlocking system keeps the keyway visually cedar, creates a consistent shingle pattern, and lets a builder move from the starter course upward with less layout and sorting. This guide explains the process for contractors, installers, and homeowners evaluating a premium Western Red Cedar exterior.
Request a wholesale quote for Craft Global cedar shingle panels for your next project.
What Is an Interlocking Cedar Shingle Panel System?
An interlocking cedar shingle panel system combines multiple Western Red Cedar shingles into a preassembled panel with a designed keyway. Instead of placing and aligning every shingle separately, the installer fastens each panel to a prepared, nailable wall. Craft Global cedar shingle panels use 100% old growth Western Red Cedar, varied shingle sizes, and a thick butt for a deeper shadow line.
The panel is not a substitute for a wall assembly, flashing plan, or local code review. It is a cladding component. The substrate, water-resistive barrier, drainage details, fasteners, exposure, and clearances still need to match the project plans and applicable building requirements.
- Interlocking keyway: The joint is designed so the visible keyway reads as cedar rather than an exposed backer.
- Panelized layout: Several shingles are positioned together, reducing repetitive individual placement.
- Authentic variation: Mixed shingle sizes and a thicker butt preserve the irregular character associated with cedar siding.
- Trade efficiency: Craft Global reports about 50 to 60 percent less labor and installation that can be 6 to 8 times faster than traditional shingles. Treat those figures as product-level guidance, not a universal job estimate.
For broader material selection, review Craft Global's engineered cedar siding and specialty cedar buyer resource before finalizing the wall assembly. This installation article focuses on the shingle-panel spoke, not the full range of siding profiles, lumber, and fascia products.
Tools and Materials Needed Before You Begin
A successful cedar shingle panel installation starts with the right fastening, layout, cutting, and moisture-management tools. Before unloading panels, confirm the wall is nailable, the required underlayment and flashing are on site, and the installation instructions for the selected panel system are available to the crew. Keep the following list as a project planning checklist.
Layout and cutting tools
- Tape measure, pencil, chalk line, and a combination square
- Two-foot level and a shorter level for openings and trim
- Sharp utility knife and a saw suited to clean cedar cuts
- Chalk line or laser level for the starter course and reference lines
- Snips or the approved tool for cutting flashing and J-channel
Fastening and access equipment
- Manufacturer-approved corrosion-resistant siding nails or fasteners
- Hammer or pneumatic siding nailer set to avoid crushing the cedar
- Caulking gun and compatible exterior sealant where the detail requires it
- Ladder, scaffold, or lift selected for stable access to the work area
- Personal protective equipment, including eye, hearing, and fall protection as required
Wall and trim materials
- Cedar shingle panels and any system-specific corner or transition pieces
- Code-compliant water-resistive barrier and approved flashing
- Head flashing, sill flashing, drip edges, and compatible tapes for openings
- J-channel or the specified edge profile around windows, doors, and terminations
- Starter material, trim boards, and blocking where the project detail calls for them
Do not choose fasteners only by length or appearance. The fastener must suit the panel, substrate, exposure, and local conditions. If a project is in a coastal, high-humidity, or high-wind environment, have the designer or building official confirm the required corrosion resistance and fastening schedule.
How Do You Prepare the Wall for Cedar Shingle Panels?
Prepare the wall by confirming a flat, nailable substrate, installing the specified water-resistive barrier and flashing, and establishing a level starter line. The panel system cannot correct an out-of-plane wall or replace water management. Resolve sheathing, framing, opening, and clearance issues before the first panel is cut or fastened.
- Confirm the substrate. Check that the sheathing or other approved backing is sound, dry, flat enough for the system, and capable of receiving the specified fasteners. Mark stud locations when the layout or detail requires them.
- Review the opening plan. Identify windows, doors, outside corners, inside corners, roof intersections, and penetrations. Confirm where head flashing, sill flashing, trim, and drainage paths will direct water.
- Install the water-resistive barrier. Follow the project plans and local code for laps, transitions, and penetrations. Do not assume a shingle panel is the water-resistive layer.
- Flash before cladding. Integrate flashing with the wall drainage plane at windows, doors, corners, and horizontal transitions. Use compatible tapes and sealants where specified.
- Snap a control line. Establish the lowest finished elevation and a level reference for the starter course. Measure from a reliable datum, not from an uneven slab, grade line, or existing trim that may not be level.
- Dry-plan the first courses. Check panel width, end joints, corner conditions, and the relationship between exposure and openings. A few minutes of dry layout can prevent a narrow, awkward cut at a highly visible corner.
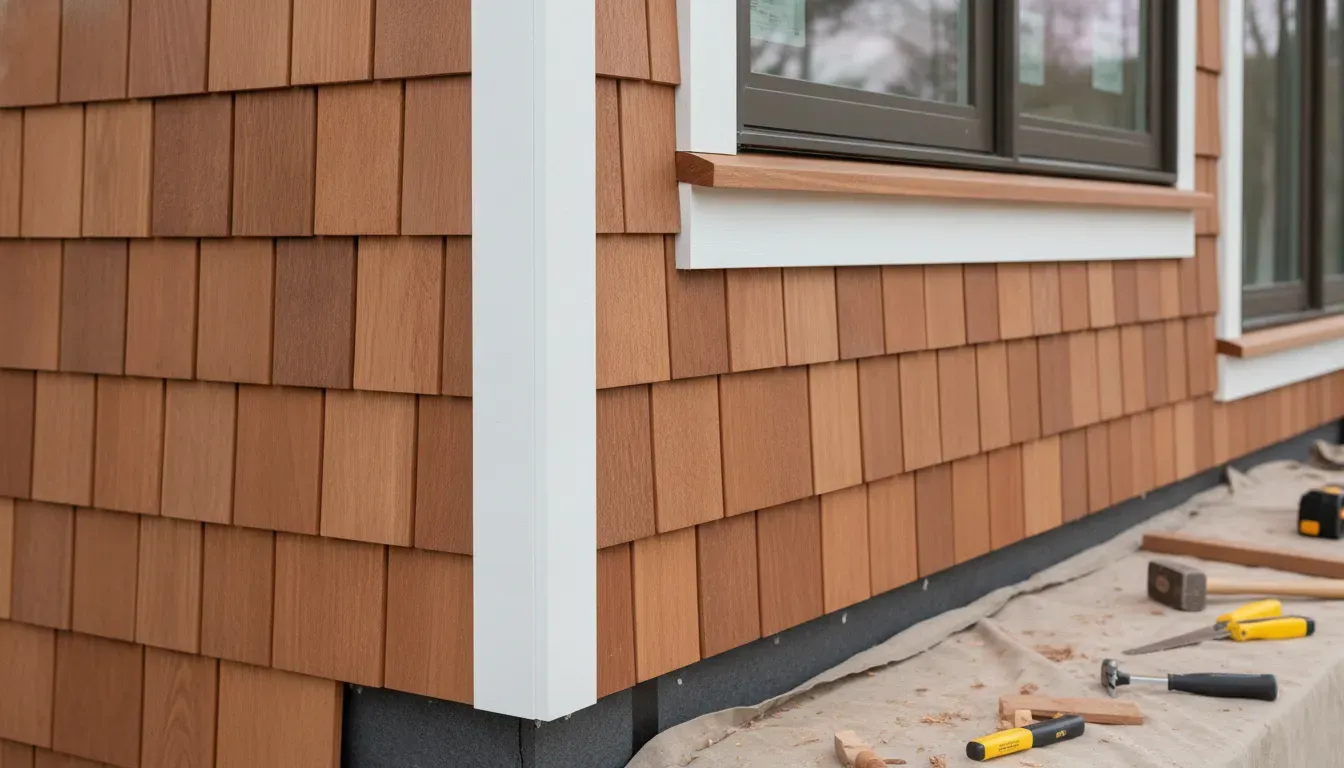
The Cedar Shingle Panels product page describes the Craft Global system as an interlocking panel made from old growth Western Red Cedar. Confirm the exact panel dimensions, exposure, and installation details for the order rather than transferring measurements from a different shingle manufacturer.
Step-by-Step Installation Sequence for Cedar Shingle Panels
Install interlocking cedar shingle panels from the lowest planned course upward, keeping the first course level and every joint, exposure, and fastener location consistent. Work across a manageable section, check the pattern from a distance, and protect the drainage and flashing details as the wall rises. The sequence below is a field-ready framework, not a replacement for the product instructions.
1. Establish the starter course
Install the approved starter material or starter detail along the control line. The bottom edge needs the intended clearance from grade, roofs, decks, and other horizontal surfaces. Use a level frequently. If the first course wanders, the error becomes more visible with every row above it.
2. Set the first panel
Place the first panel according to the specified corner and exposure detail. Check that the panel is seated correctly, the interlocking relationship is engaged, and the keyway is not distorted. Fasten only in the approved nail zone or fastening area. Do not drive a nail through the exposed face where it will interrupt the intended pattern unless the instructions specifically call for face fastening.
3. Continue across the wall
Work across the first course, checking level and end-joint placement. Keep panel ends supported and follow the required joint treatment at studs, blocking, corners, or trim. Avoid creating a repeating vertical line. Staggering joints improves the appearance and reduces a ladder-like visual pattern.
4. Build the next courses
Move upward only after the first course and its transitions are correct. Seat the lower edge of each panel into the intended interlock or exposure, then verify the panel is straight before fastening. Maintain the required spacing at corners and openings. Never force a panel into alignment if doing so bows the panel or closes a drainage path.
5. Work around windows and doors
Measure each opening rather than assuming the framing is identical from one side to the other. Preserve head, jamb, and sill flashing details. Cut panels cleanly, keep end grain protected as specified, and coordinate the reveal with trim and J-channel. Small differences in opening size are easier to manage when they are distributed across planned courses instead of hidden in one oversized cut.
For installers who also source other cedar materials, Craft Global's specialty lumber collection and clear cedar T&G engineered planks serve different applications. Do not substitute a T&G plank installation detail for an interlocking shingle-panel detail.
Corner Trim, J-Channel, and Edge Finishing Details
Corners and edges determine whether a cedar shingle panel wall looks intentional and stays protected. Treat outside corners, inside corners, windows, doors, roof lines, and panel terminations as separate details. The right trim choice depends on the design, drainage plane, panel exposure, and manufacturer instructions. Keep all transitions aligned with the water-management strategy.
Outside corners
Decide whether the project uses a trim board, a panel-to-panel corner, or a manufacturer-supplied corner component. Establish the corner before starting the field panels. Keep the corner straight and plumb, provide the specified clearance, and leave room for movement and sealant where required. A corner that is slightly out of square can force every panel into a visible taper.
Inside corners
Inside corners need a planned backing or trim surface so panel ends have a stable, protected termination. Install the specified corner strip or trim, then cut panel ends square and maintain the required gap or sealant joint. Avoid packing the corner so tightly that seasonal movement pushes panels outward.
J-channel and window edges
Use J-channel or the specified edge profile only where the project detail calls for it. Keep the channel aligned, leave the required expansion space, and avoid blocking drainage at the sill. At the head, integrate flashing above the trim. At the sides, keep cuts clean and consistent so the shingle pattern terminates without exposing the panel backer.
Rakes, eaves, and horizontal transitions
At roof lines and other horizontal transitions, coordinate the panel finish with metal flashing, trim, and clearance requirements. Cedar should not be trapped against a wet surface. Plan for runoff, ventilation, and maintenance access. When the detail is not shown in the plans or product instructions, pause and obtain a project-specific answer rather than improvising a caulk-heavy repair.
Common Installation Mistakes and How to Avoid Them
Most cedar shingle panel problems begin with layout, moisture management, or fastening decisions made before the first full wall is installed. A disciplined preflight and frequent checks are faster than removing a finished section. Use this list during the crew briefing and final walk-through.
| Mistake | Why it causes trouble | Better practice |
|---|---|---|
| Starting from an uneven reference | The courses drift and trim reveals become inconsistent. | Use a verified level datum and snap a control line. |
| Skipping flashing or the drainage plane | Cladding cannot compensate for missing water management. | Install and inspect barrier, flashing, and transitions before panels. |
| Overdriving fasteners | Crushed cedar can lose holding power and create a visible defect. | Set the tool correctly and keep fasteners in the approved zone. |
| Repeating end joints | A straight vertical seam makes the wall look assembled instead of natural. | Plan joint staggering and review the pattern from several steps away. |
| Blocking an edge detail | Water can collect at windows, trim, or horizontal transitions. | Preserve the specified drainage path and clearance. |
| Mixing installation systems | Exposure, fastener locations, and corner details may not transfer. | Follow the exact instructions for the selected panel system. |
Also avoid using unverified performance promises in the field. Craft Global lists a 22-year manufacturer warranty for its cedar shingle panels, but warranty coverage can depend on the product, installation, maintenance, and documentation. Give the buyer the current product and warranty information and keep the installation record with the project file.
How Does Panel Installation Compare With Individual Cedar Shingles?
Individual cedar shingles allow highly flexible layout and can suit complex, curved, or historically detailed work, but they require more piece-by-piece sorting, alignment, and fastening. Interlocking panels standardize more of the field installation while preserving a natural cedar appearance. The right choice depends on the wall design, crew skill, production schedule, and detail requirements.
| Project consideration | Interlocking panels | Individual shingles |
|---|---|---|
| Field layout | Panel pattern establishes much of the spacing. | Installer controls each shingle and course. |
| Installation speed | Designed to reduce repetitive placement and sorting. | Usually more piece-by-piece labor. |
| Pattern variation | Built-in variation comes from the panel design. | Maximum control over each shingle and transition. |
| Complex details | Requires careful cuts at corners and openings. | Can adapt more freely to unusual geometry. |
| Ordering decision | Confirm panel dimensions, exposure, and system details. | Confirm shingle grade, exposure, and fastening schedule. |
The official Western Red Cedar Lumber Association shingle-panel installation resource is useful for understanding panel application principles. For a different product or assembly, always use the applicable manufacturer instructions and local code requirements.
Frequently Asked Questions About Cedar Shingle Panel Installation
What do you put under cedar shingle panels?
Install the water-resistive barrier, flashing, and any drainage components required by the wall design, local code, and panel instructions. Cedar shingle panels are cladding, not a substitute for the wall's water-management layer. Confirm laps, penetrations, opening details, and clearances before fastening the first course.
Do you nail or staple cedar shingle panels?
Use the fastener type and fastening method specified for the selected panel system, substrate, exposure, and local conditions. Do not assume a stapler or a generic nail is acceptable. Verify corrosion resistance, length, placement, and tool settings with the installation instructions or the project professional.
Should cedar shingle panels be installed from the bottom up?
Yes, the typical sequence starts with a level starter course and proceeds upward so each course maintains the intended exposure and sheds water over the course below. The exact starter, overlap, and corner details still come from the manufacturer and project plans.
How do you finish cedar shingle panels around windows?
Coordinate panel cuts with sill, jamb, and head flashing, then use the specified trim or J-channel while preserving drainage and clearance. Measure each opening, keep cuts clean, and install head flashing above the trim. Never seal an edge in a way that traps water behind the cladding.
Are interlocking cedar shingle panels faster to install than individual shingles?
They are designed to reduce repetitive layout and placement. Craft Global reports about 50 to 60 percent less labor and installation that can be 6 to 8 times faster than traditional shingles, but actual production depends on the crew, wall geometry, access, substrate, openings, and required details.
Get installation and sourcing guidance from Craft Global for your cedar shingle panel project.
Plan the Panel Order Before the Crew Starts
Good cedar shingle panel installation is a sequence of small verified decisions: choose the correct system, prepare the substrate, protect the drainage plane, level the starter, stagger joints, and finish openings deliberately. For a trade project, share elevations, quantities, opening locations, and delivery timing before ordering so the panel plan supports the whole exterior rather than only the first wall.
Craft Global supplies engineered cedar products for builders, contractors, distributors, and homeowners seeking a premium natural exterior. Visit the Cedar Shingle Panels product page for the core product information, review the Engineered Cedar partners page for related siding resources, and contact the team when the project requires a product-specific recommendation.